Faux finishing has become increasingly popular among DIY enthusiasts and professional decorators alike. The art of using paint to imitate various textures and materials is a versatile technique that has been used for centuries to enhance the visual appeal of homes and buildings. It comes with a range of decorative effects, from minor texture and color combinations to stunning and dramatic motifs. As such, it is frequently used in interior design for walls, ceilings, and furniture with more depth and texture.
What is Taping?
Taping is an important technique for home improvement tasks to achieve a finished product that looks professional. In home renovation, taping refers to applying various kinds of adhesive tape to a project to provide a polished and expert-looking finish. Many different types of tape, including masking, painter’s, duct, electrical, and more, are used in DIY projects.
Each variety of tape has distinct qualities and is employed for a particular task, such as masking off areas for painting, attaching wires and cables, or filling in gaps and holes. Painting, electrical work, plumbing, and drywall construction are a few home repair chores that frequently use taping as a technique.
Different Taping Styles for Home Projects
Several kinds of tape are frequently employed for home improvement tasks, including:
- Painter’s tape
- Drywall tape
- Electrical Tape
- Duct tape
- Masking tape
Uses of Taping for House Projects
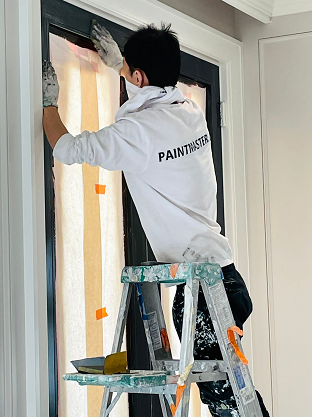
Painter’s tape
It is a crucial tool for obtaining a straight line or crisp edge while painting walls, ceilings, or trim. It is also used to finish walls and ceilings.
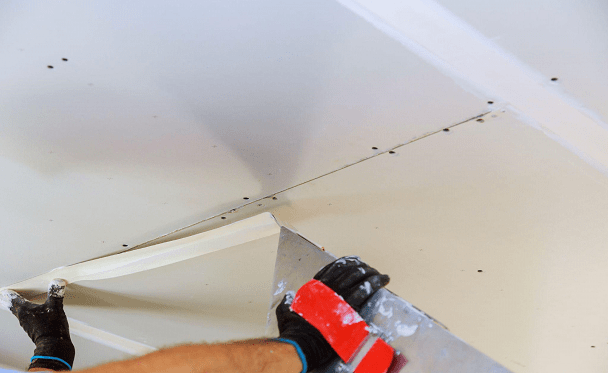
Drywall tape
It reinforces the connections between drywall panels and stops cracks from forming when patching and repairing drywall to provide a smooth surface for painting or wallpapering.
Electrical tape
It protects and secures wiring, reducing the risk of damage.
Duct Tape
They are frequently applied as a temporary remedy for damaged things like a shredded backpack, a torn tent, or a chipped automobile bumper.
Masking Tape
It is frequently used to conceal places that require paint protection, such as trim, windows, and doorframes.
Techniques of Taping for House Projects
A professional-looking finish can only be attained by applying tape correctly. Here are some tips for correctly using tape:
- When using painter’s tape, push it down firmly to prevent paint from seeping underneath while applying it to create a straight line or crisp edge. Remove the tape while the paint is still wet to avoid removing dried paint.
- Apply joint compound to the seam between two drywall panels, then press the drywall tape into the compound, smoothing out any bubbles or wrinkles to ensure proper application and prevent cracks. Over the tape, apply a second coat of joint compound and feather it out to get a flat surface.
- Electrical tape to secure and protect wires will help avoid damage or potential problems. Just wrap the tape around the wire in a tight, even circle without overlapping. Use heat-shrink tubing to cover and insulate any exposed wires.
Benefits of Taping for House Projects
Tape is a common choice for DIYers and professionals because it has several advantages for home projects. A project’s finish can be polished and professional-looking using tape to enhance precision. Additionally, it can save time by enabling more effective work and removing the need for excessive caution in some situations.
Taping off specific areas can shield surfaces from harm during a messy or potentially destructive project. Due to the wide variety of tapes, each of them has unique properties and uses, and tape provides a flexible solution for a variety of applications. Beginners and do-it-yourselfers can utilize it because it is affordable and easy to use.
Risks and Precautions
Here are the possible risks and precautions for taping:
Risks:
- A poor finish or damage can result from incorrect taping.
- Tape removal mistakes can leave residue or harm surfaces.
- Failure or dangers can result from using the wrong kind of tape for the task.
Precautions:
- Read and carefully follow the instructions on the tape.
- Before using the tape on the entire surface, test it on a small, discrete area.
- Slowly and carefully remove the tape, careful not to rip it or leave any residue behind.
- When the project is finished, remove the tape as soon as possible because leaving it on for too long increases the possibility of harm or residue.
Transform your home with a flawless paint job today!
Interested in advancing your home improvement initiatives? Trust the professionals at PAINTMASTER.ca to provide a full-service taping experience that will leave your walls looking smooth, even, and prepared for a spectacular finish. Refrain from settling for poor results. To begin painting your home, set an appointment right today! Feel free to visit our website https://paintmaster.ca/ to learn more about our unique services!
| 2023 HomeStars Award Winners | Official Drywall Contractors For The 2023 Princess Margaret Dream Muskoka Cottage Lottery | Painting Specialists At Work Since 1966 |
